
For the purpose of this tutorial I'll be creating the domino with the blue background and the pink metallic dress.
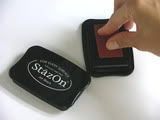
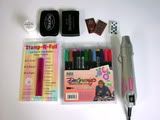 Here's what you'll need: 1 roll of your favorite color of Stamp-N-Foil (I'm using Hot Pink), 1 jar of Stamp-N-Foil bonding powder, a black StazOn ink pad, 1 VersaMark ink pad (or any color pigment ink-the foil is opaque so the ink won't show through), a heat tool, a package of dominoes, a background stamp (I'm using a swirl pattern), and a foreground stamp (I'm using a dress on a dress maker's form).
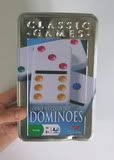
When purchasing dominoes for stamping, the most common and inexpensive are the "double six" dominoes and they're available at most Wal-Marts, Targets, etc. They come in packs of 28, so one pack should last you quite a while.
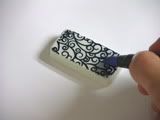
 The first step is to ink up the background stamp with your StazOn ink pad. In this example I used a swirl pattern in the background so that my main image would pop out.
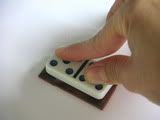
Lay your background stamp flat on your work surface with the image face up. Now, lay your domino, blank side down on top of it and press straight down. Since my stamps were unmounted, stamping this way gave me a nice even pressure. Carefully remove the domino from the stamp.

Dry the stamped image using your heat tool. This step is optional, but we're going to color the domino with markers in the next step and I like to make sure there isn't any wet ink left that will make my colors muddy.
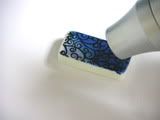
I chose to make the background of my domino a blue gradient. To create this effect, color the entire domino with the lightest color in the gradient with a brush tip marker.
Next, quickly take the darker shade and color one end of the domino with that color. You want to do this step before the first color ink dries because we're going to blend the two colors together in the next step.
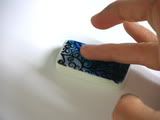
This is my favorite step! To blend the two colors together, while they're still wet, lightly tap your finger over the area where the two colors come together. You will begin to see the colors blend. Just play around with this technique until you get a result you like.
Once you've got the background coloring the way you want it, dry the ink with your heat tool. We're going to sprinkle on some bonding powder and we don't want it sticking to our background ink.

Once your background ink is dry, you want to ink up your foreground stamp using your VersaMark ink pad. If you don't have a VersaMark ink pad you could use any color pigment ink you have on hand. Since the Stamp-N-Foil is opaque you won't see the ink behind it anyway. (Stamp-N-Foiling is a great way to use those pigment colors you only use once in a while!)
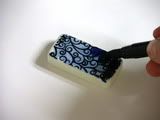
 Using the same stamping technique we used to stamp the background image, stamp the foreground image.
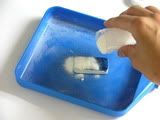
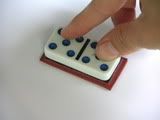
Sprinkle the Stamp-N-Foil bonding powder over the stamped image (this part is just like embossing).
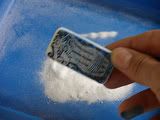
Tap off any excess powder. Remember, wherever the powder is, the Stamp-N-Foil will stick.
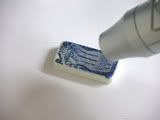
Heat set the Stamp-N-Foil bonding powder using your heat tool until the powder becomes glossy.
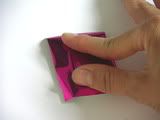
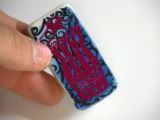
While the Stamp-N-Foil is still hot, place a piece of Stamp-N-Foil over the domino. Smooth out the foil with your fingers as you press it into the image area. Don't go crazy with the smoothing/pressing; you don't want to pull it off. Just make sure the foil is firmly set in place on the melted bonding powder. Allow the domino and foil to cool until it reaches room temperature and then slowly peel off the foil.
The final product can be sealed with Mod Podge (I like the look of the Gloss), and used for keychains, magnets, jewelry, etc.Stamp-N-Foil, and Stamp-N-Foil bonding powder: available at www.stampee.net.
Stamps: off of the #Bold-121 sheet of stamps from www.TheEnchantedGallery.com.
Markers: Dee Gruenig's Signature Series Tropical brush markers.
No comments:
Post a Comment