Monday, August 24, 2009

Black Out Foil Available Now at Stampee Crafts!

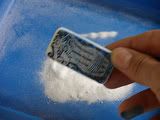
At the Craft Super Show, you asked, and we listened! Black Out is the latest foil color to be released from Stampee Crafts and it's just in time for all of your fun Halloween projects. In this photo you can see a side by side comparison of plain black ink (top), and our Black Out foil (bottom). 

About Black Out:
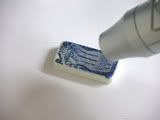
Black Out foil is the perfect counterpart to our White Out foil. Instead of giving a metallic or holographic finish like many other foils, Black Out gives a glossy, opaque black finish to stamped images. This is a great feature when you want to add something extra to your paper creation but don't want to add the dimension or bulk of embossing.

Keep in mind that you can use ANY COLOR INK behind Black Out, and you will get a glossy black finish every time.

Look out for a Stampee Crafts News special on Black Out and Orange foil for all of your upcoming holiday creations!


♥ Stacey

Friday, July 24, 2009

Prepping for CHA Summer Show

I hope that everyone's aware that the CHA Summer Trade Show and Craft Super Show are starting next Tuesday! Everyone here at Stampee Crafts is excited to be officially launching our new product, Stampee Foil, at the show.

CHA Summer Trade Show:
Retailers, please be sure to stop by booth #1309 to view our complete product line including foils, adhesives, embossing powders, and glitters.

We will be running continuous demonstrations on how to use Stampee Foil for the duration of the trade show. Don't forget to pick up a swatch book of all of our Stampee Foil colors and designs to use for reference when you're placing future orders!

Craft Super Show:
Retail customers, be sure to come by booth #2224 to create fun make and take projects. Our make and take section is set up so that you may come to the booth at any time to try the Stampee Foil process. There will be a table set up with stamps, ink, Stuck on You! bonding powder, Stampee Foil, and laminators.

We will have every color of Stampee Foil available for purchase, as well as our full line of glitters, embossing powders, and adhesives.

SHOW SPECIALS will be available. Don't miss us!


♥ Stacey

Monday, July 13, 2009

Art Doll Swap on Rubber Stamp Chat Forum

Here's a project I did for a recent paper doll swap on Rubber Stamp Chat Forum.

The Challenge: Create a doll at least 6" tall using at least two stamped images. The doll also had to be articulated in at least 4 places.

I had never created a paper doll before so I printed off a paper doll template from The Enchanted Gallery website. It's worth perusing the paper doll section on that site anyway because there are a lot of good suggestions about how to stamp/assemble your doll. They have regular doll templates as well as mermaid templates. Since I had some clear water patterned holographic foil laying around, and some silver foil that looked like scales, I opted for the mermaid. :)

Here's how I made the lovely lady:


1. First I used my inkjet printer to print the mermaid pattern onto a cream colored card stock and then I cut out the appropriate pieces (except for the tail). The stamp I wanted to use for the face was a little too small in scale for the mermaid's body, so I cut everything down to size so it would fit more proportionately.

2. I loosely cut out the tail so it was surrounded by a little space and stamped over the entire area with my VersaMark watermark stamp pad. Then I applied Stuck on You! bonding powder and heat set the powder with my heat tool. When the bonding powder was set, I applied Stampee Foil in the Silver Mesh pattern to the area using the laminator method (watch our tutorial video here).

3. After I finished applying the foil I cut the tail out. Applying foil beyond the edge of the tail pattern and cutting it down to size after ensured that the tail would have nice clean edges. I cut the end of the tail off and rounded the edges on both pieces so I could use this as one of the points of articulation. I then set the tail pieces to the side for assembly later.

4. Using a stamp from The Enchanted Gallery I stamped the mermaid's face/hair with black StazOn ink onto the same cream colored card stock I used for the template. Then I colored the image with colored pencils and cut it out.

5. Using the same colors I did on the face, I colored the rest of the pieces of her body: the torso, upper arms and lower arms.

6. When all of the body parts were colored I stamped over all of them with my VersaMark watermark ink pad, applied foil bonding powder, set the powder with my heat gun and applied the Stampee Foil in the Clear Water pattern using the laminator method. The clear foils are really nice because they just give a holographic pattern to whatever you're stamping (such as glitter patters, water, bubbles, etc.) while still showing all of the colors underneath.

7. For her "bathing suit" I used two small pieces of a border stamp and applied Lavender foil over them. I cut the pieces out with an Xacto knife and attached them to the torso using 3D double sided tape. I should note that I molded them downward on the outside edges to make her "anatomically correct," hehe.

8. At this point, all of my pieces were ready for assembly. I just played around with the pieces until I got them where I thought they should be and then I used a thumb-tac to poke holes through the layers where I intended to put brads.

9. I attached the end of the tail, both arms and both elbows with brads so they would be movable. I used glue and tape to attach her head to her torso and her torso to her tail.

Now she's ready to be post marked and sent off to my swap buddy!

Please visit www.stampee.net for Stampee Foil and "Stuck on You!" bonding powder ordering information!

♥ Stacey

Tuesday, July 7, 2009

New Video Tutorials

New video tutorials have been added to the right column of the blog showing how to apply Stampee Foil with a hot laminator, a heat gun, and a household iron. Just select your application method for step by step instructions!

♥ Stacey

Tuesday, June 30, 2009

Here's a new project that I just completed for a sketch challenge sponsored by Another Stamp Company on Rubber Stamp Chat. The challenge was to create a card with a similar layout to one that was posted. Everyone who participated was entered into a drawing for a few sheets of free stamps.

Here's how I made the card:
1. Using my new stamps from The Enchanted Gallery, I stamped the images of the women onto gray card stock I had cut into 1.5" squares using black StazOn ink.


2. After the girls were stamped, I colored them in using colored pencils.

3. Once the gils were colored, I attached each gray square to a larger square of sparkly lilac card stock. Once that was done I set the girls off to the side.

4. Using silver pigment ink, I stamped a pattern using a flourish stamp (available at Michael's) onto the left side of the card.

5. I sprinkled on some "Stuck on You!" bonding powder over the flourishes and applied Rainbow Silver Stampee Foil using the traditional pouch laminator method (there's a video tutorial of this method on the right column of this blog).

6. After the foil was applied, I cut two thin strips of paper, which I layered, to run down the center of the card. The bottom paper has a geometric gray and white design, and the top is a white vellum with a small polka dot pattern.

7. Once I glued down the center strip of paper, I used 3 dimensional double sided tape to attach the girls to the right side of the card.

Wish me luck on those free stamps!

♥ Stacey

Thursday, June 25, 2009

Using Glitters

Did you know that in addition to carrying a full range of stamping foils, Stampee.net also sells embossing powders and glitters? At several trade shows we've shown samples of stamped images that incorporate glitter and we've been asked over and over again how the look was created.

This is a domino that is stamped with one of the images in the stamp set "Four Modern Women" from The Enchanted Gallery. This look was achieved by stamping the image on the domino with VersaMark ink, and then sprinkling on a clear embossing powder (fine) with rainbow glitter (also available in red, blue, gold and silver) mixed in. Both of these products are available at Stampee.net. 


This is one of the easiest ways to incorporate glitter into your stamping projects and you can get a wide range of effects just by mixing colors and varying the ratio of glitter to embossing powder. 


Added bonus, you ask? The glitters are more durable when mixed with embossing powders as opposed to using some form of adhesive to attach them to your projects! Enjoy!

♥ Stampee Diva


Monday, June 22, 2009

May Color Tag Challenge

Here's my finished product for the May Color Tag Challenge swap coordinated by Inky Whiskers on Rubber Stamp Chat forum. The challenge was to create 4.35" x 2.75" tags to swap with other members using a specific color scheme. This month the colors were orange, turquoise, cream and each stamper had to pick a fourth color to add. Neutrals were freebies.

Aside from the tag challenge set up by Inky Whiskers, I knew I would be incorporating Stampee Foil into the design. I wanted to use the distressed foil technique (May 2009), because the bottom layer of ink that shows through the distressed foil could easily add the fourth color to my scheme.

My final color scheme: orange, turquoise, cream and gold.

This is how I created the tags:
1. The tags were cut out of a cream colored parchment style card stock.

2. The edges of each tag were aged with a combination of Slate and Meadow Adirondack alcohol inks from Ranger. I just took a few drops of each color on the dabber and added a bit of blending solution. Then I started with the dabber off of the tag and brought the color onto the edges and blended. This gave the tag a nice aged effect that coordinated with the distress technique used to apply the Stampee Foil. Tim Holtz has a great YouTube video tutorial showing the different ways the Adirondack inks can be used.
Watch Tim's fancy video.

3. Using a large french script stamp inked with Encore gold pigment ink, both from
Stampin' Up, I stamped the background image over the whole card.

4. Using the distressed foil technique I applied Stampee Foil in
Aquamarine over the entire background image. Note: when the aqua foil is removed, small areas of gold pigment ink are revealed.

5. After the background was completed I used an embellished Cherish stamp (Stampin' Up) inked with the gold pigment ink, to stamp the image in the top right hand corner of the tag.

6. I then used the distressed foil technique to apply
Orange Stampee Foil to the newly stamped image.

7. My tags were ready for swappin'. :)

♥ Stacey

Tuesday, June 16, 2009

Product Review from Firecracker Designs: Stamp-N-Foil Fish

Pamela of Firecracker Designs was recently contacted by a company called Stampee.net about possibly carrying this foil product in her store. Stampee.net offered a test sample of the Stamp-N-Foil and bonding powder, and yours truly was designated as the official tester for FCD. :o)

The foil product comes in a generous 4.75" x 20' roll, so there is plenty to play with. The maker intends for the product to be used/applied with the aid of a heat laminating machine. As I don't own one, nor was I willing to buy one specifically to test this product, I set out on a mission to see how it could be used sans laminator.

My first few experiments invloved the foil, bonding powder, a heat gun and bone folder. This produced okay results. It was a bit hard on the fingers since I had to be right under the heat gun rubbing with the bone folder; the results were decent, albeit distressed. If you were going for a distressed look, this would be an acceptable application method - but watch your fingers!

So, the next thing I tried was a fine tipped glue pen (Zig) and free-handed drawing. I placed the foil directly on top of the glue pen design, tapped it in place with my fingers, and let it dry. Once dry, I removed the foil sheet. The results were very exciting! Even though I only used a border scrap of paper for this test, I may try to incorporate it into a future piece of work. It was playful and fresh.
So, the next thing I decided to do, was use one of FCD's die cuts, the something fishy fish to be specific, and the coordinating stamp. I covered the foil with a piece of paper to protect it, and rubbed it to firmly adhere it. I then set it aside to dry. Once dry, I removed the foil sheet, and stamped the image on top using black Stazon, and added a bit of shimmerz to lightly color portions of the fish. I then attached this matte to a plain ivory card. To finish the card, I used the fine tip Zig glue pen and drew a border around the card. I then covered the glue with some foil strips and set it aside to dry. The finihshed results are quite happy: shiny, playful, cheery. This will definitely brighten anyone's day! What do you think? This is the scanned version; you know scans never show shine very well, but this version captures the color fairly well:


Here are a couple of alternate views taken with a camera to capture the shine. Notice the shimmery background on the handmade paper? Lovely, isn't it? And the clean shine of the foil on the border and fish - also very pretty:


Hope you enjoyed this product test. The product is fun, but to really appreciate its intended purpose, you must have a heat laminator. The product is supposed to work with a stamped image, coat with bonding powder & heat (like you would a clear EP), then apply the foil, cover with a sheet of paper, and feed through a laminator. When done, the image is supposed to be a perfect rendition of the stamped image in foil. I suspect not many stampers own a heat laminator. If you do, and would be interested in seeing this product in FCD's store, I'd appreciate a comment back.

As always, thanks for stopping by! Happy Stampin'!
Ursula
Thanks to Ursula and Firecracker Designs by Pamela!
To purchase Something Fishy stamps and die cuts and Shimmerz, please visit Firecracker Designs 
♥ Stampee Diva

Monday, June 1, 2009

Domino Art and Stamp-N-Foil


For the purpose of this tutorial I'll be creating the domino with the blue background and the pink metallic dress.


Here's what you'll need: 1 roll of your favorite color of Stamp-N-Foil (I'm using Hot Pink), 1 jar of Stamp-N-Foil bonding powder, a black StazOn ink pad, 1 VersaMark ink pad (or any color pigment ink-the foil is opaque so the ink won't show through), a heat tool, a package of dominoes, a background stamp (I'm using a swirl pattern), and a foreground stamp (I'm using a dress on a dress maker's form).

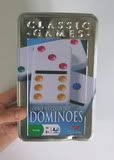
When purchasing dominoes for stamping, the most common and inexpensive are the "double six" dominoes and they're available at most Wal-Marts, Targets, etc. They come in packs of 28, so one pack should last you quite a while.


The first step is to ink up the background stamp with your StazOn ink pad. In this example I used a swirl pattern in the background so that my main image would pop out.


Lay your background stamp flat on your work surface with the image face up. Now, lay your domino, blank side down on top of it and press straight down. Since my stamps were unmounted, stamping this way gave me a nice even pressure. Carefully remove the domino from the stamp.


Dry the stamped image using your heat tool. This step is optional, but we're going to color the domino with markers in the next step and I like to make sure there isn't any wet ink left that will make my colors muddy.


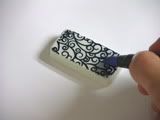
I chose to make the background of my domino a blue gradient. To create this effect, color the entire domino with the lightest color in the gradient with a brush tip marker.


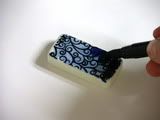
Next, quickly take the darker shade and color one end of the domino with that color. You want to do this step before the first color ink dries because we're going to blend the two colors together in the next step.


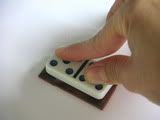
This is my favorite step! To blend the two colors together, while they're still wet, lightly tap your finger over the area where the two colors come together. You will begin to see the colors blend. Just play around with this technique until you get a result you like.


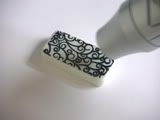
Once you've got the background coloring the way you want it, dry the ink with your heat tool. We're going to sprinkle on some bonding powder and we don't want it sticking to our background ink.


Once your background ink is dry, you want to ink up your foreground stamp using your VersaMark ink pad. If you don't have a VersaMark ink pad you could use any color pigment ink you have on hand. Since the Stamp-N-Foil is opaque you won't see the ink behind it anyway. (Stamp-N-Foiling is a great way to use those pigment colors you only use once in a while!)
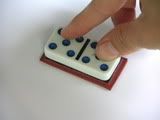

Using the same stamping technique we used to stamp the background image, stamp the foreground image.


Sprinkle the Stamp-N-Foil bonding powder over the stamped image (this part is just like embossing).


Tap off any excess powder. Remember, wherever the powder is, the Stamp-N-Foil will stick.


Heat set the Stamp-N-Foil bonding powder using your heat tool until the powder becomes glossy.


While the Stamp-N-Foil is still hot, place a piece of Stamp-N-Foil over the domino. Smooth out the foil with your fingers as you press it into the image area. Don't go crazy with the smoothing/pressing; you don't want to pull it off. Just make sure the foil is firmly set in place on the melted bonding powder. Allow the domino and foil to cool until it reaches room temperature and then slowly peel off the foil.
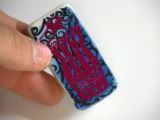

The final product can be sealed with Mod Podge (I like the look of the Gloss), and used for keychains, magnets, jewelry, etc.
Stamp-N-Foil, and Stamp-N-Foil bonding powder: available at www.stampee.net.
Stamps: off of the #Bold-121 sheet of stamps from www.TheEnchantedGallery.com.
Markers: Dee Gruenig's Signature Series Tropical brush markers.

Tuesday, May 19, 2009

Card Swap: Let's Go On Safari

This month I participated in my first card swap, which was coordinated through Stampin' Stacy at RubberStampChat.net. The swap had a safari theme and the finished product was to be a post card (meaning, no layers, glitter, etc.) This card is the finished product and it combines stamping, Stamp-N-Foil, chalks, and embossing. 


Here's what you'll need: 
For the giraffe: a safari themed animal stamp, 1 quick drying ink pad in a dark color (StazOn in Timber Brown), and blending chalks.
For the center foil section: 1 roll of your favorite color of Stamp-N-Foil (Copper Penny), 1 jar of Stamp-N-Foil bonding powder, 1 VersaMark watermark stamp pad, an animal print stamp, a piece of 8.5" X 6.5" copy paper, and a laminator (you can also use a household iron, please see tutorial below for further instructions).
For the right side: Your VersMark watermark stamp pad, blending chalks, 1 pigment ink pad in any color (Scarlet),  any kind of postage or travel type stamp, and a heat tool. 
Miscellaneous: Card stock cut to 3.5" X 5", a non-stick craft sheet, and your secret weapon (a stamping mat).

Place your non-stick craft sheet on top of your stamping mat.


Ink your animal print stamp with a VersaMark watermark stamp pad (you could also use any color pigment ink for this step). We're going to be applying Stamp-N-Foil bonding powder to the stamped                                                   area, so make sure you get                                             your stamp nice and juicy.


Stamp your image onto your card. Make sure you stamp on a stamp mat to get nice clean edges. I've been told that stamp mats are a stamper's Secret Weapon...and I believe it.


Sprinkle the Stamp-N-Foil bonding powder over the stamped image (this part is just like embossing).


Tap off any excess powder. You can also flick the card from the back to remove any stubborn pieces of powder that don't seem to want to "tap" off. Remember, wherever the powder is, the Stamp-N-Foil will stick.


Heat set the Stamp-N-Foil bonding powder with your heat tool until it becomes glossy.


Lay a piece of Stamp-N-Foil over your stamped image.


Cover then entire card with a piece of color copy paper. This is going to protect the foil as it goes through the laminator.
If you don't have a hot laminator don't worry, we've got you covered! Just scroll down to view the                                                   tutorial entitled "Apply                                                   Stamp-N-Foil with your                                                   household iron!"


Feed the card through the laminator. 


After the card feeds through the laminator, remove the piece of copy paper.


Starting at one end, peel the foil off of the card.  The pattern of the stamp will now be covered in foil. Now we're ready to move on to the left side of the card with the giraffe.


Ink up your safari animal stamp with a dark colored, quick drying ink. I'm using StazOn in Timber Brown.


Stamp your image near the center of the left side of the card.


Using blending chalks (I'm using Bold Brights by Inkadinkado), color in your safari animal. 


Using the blending chalks, color in the rest of your scene.  Now we're ready to move on to the right side of the card with the animal pattern on it.


In this step, we're going to use another animal print stamp to create an overall pattern on the right half of the card. Ink up your stamp with a VersaMark watermark stamp pad and make sure it's nice and juicy.


Stamp the animal print on the right half of the card making sure that you cover the entire area.


While the ink is still wet, use your blending chalks to color over the entire right side of the card. The areas of wet ink will show up darker than the background.


When you're done coloring the right half of the card, it should look something like this. Now we're ready to add a fun travel/safari detail. I've chosen a stamp of a postage stamp (confusing, right?) with the words "World Traveler" on                                               it.


Using a pigment ink in a coordinating color (I'm using ColorBox in Scarlet) ink up your safari/traveler stamp and make sure it's nice and juicy.


Stamp your image somewhere on the right half of your card. Since my stamp looks like a postage stamp, I put it all the way up in the upper right hand corner.


Sprinkle clear embossing powder over the stamped image.


Tap off any excess powder. You can also flick the card from the back to remove any stubborn pieces of powder that don't seem to want to "tap" off.  


Heat set the embossing powder using your heat tool just until the powder raises and becomes glossy.


TAAH-DAAAH!
Stamp-N-Foil, Stamp-N-Foil bonding powder, and clear embossing powder: all available at www.stampee.net.
Giraffe Animal Stamp: from the "African Animals Kit" by Rubber Stampede
Giraffe pattern stamps: from                                                             "Simply Safari" Perfectly Clear                                                                Stamps by Stampendous!
                                                                         World Traveler stamp: by                                                                    Inkadinkado